Bracketing is a powerful technique photographers use to capture a range of exposures, focus points, or white balance settings to produce a final image that represents the scene as intended. Canon’s R6 camera has multiple bracketing options designed to make this technique easier and more versatile, especially in challenging lighting or highly dynamic scenes. In this guide, we’ll explore bracketing shooting on the Canon R6, covering the different types of bracketing, how to set up each mode, and tips to get the best results.
What is Bracketing?
Bracketing involves taking a series of shots of the same scene, each with slightly different settings. On the Canon R6, bracketing options include:
- Exposure Bracketing (AEB) – Captures multiple shots at different exposure levels.
- Focus Bracketing – Takes shots at varying focus points, helpful for macro and landscape photography.
- White Balance Bracketing (WB Bracketing) – Captures the same shot with different white balance settings, useful for mixed lighting conditions.
Bracketing allows photographers to capture more data in complex scenes, later merging images or selecting the best shot to accurately represent the original subject.
Why Use Bracketing on the Canon R6?
The Canon R6’s powerful bracketing capabilities help photographers overcome the limitations of single exposures, which often fail to capture the full range of light, detail, and contrast present in real-life scenes. The Canon R6’s 20.1-megapixel sensor and advanced image processor bring additional quality to bracketed images, ensuring each shot is sharp, clear, and rich in detail.
Common situations for bracketing:
- High Dynamic Range (HDR): Combine multiple exposures for balanced highlights and shadows.
- Macro and Landscape Photography: Focus bracketing creates sharp images throughout the depth of field.
- Mixed Lighting Scenes: White Balance bracketing helps ensure accurate color tones.
Types of Bracketing on the Canon R6
Exposure Bracketing (AEB)
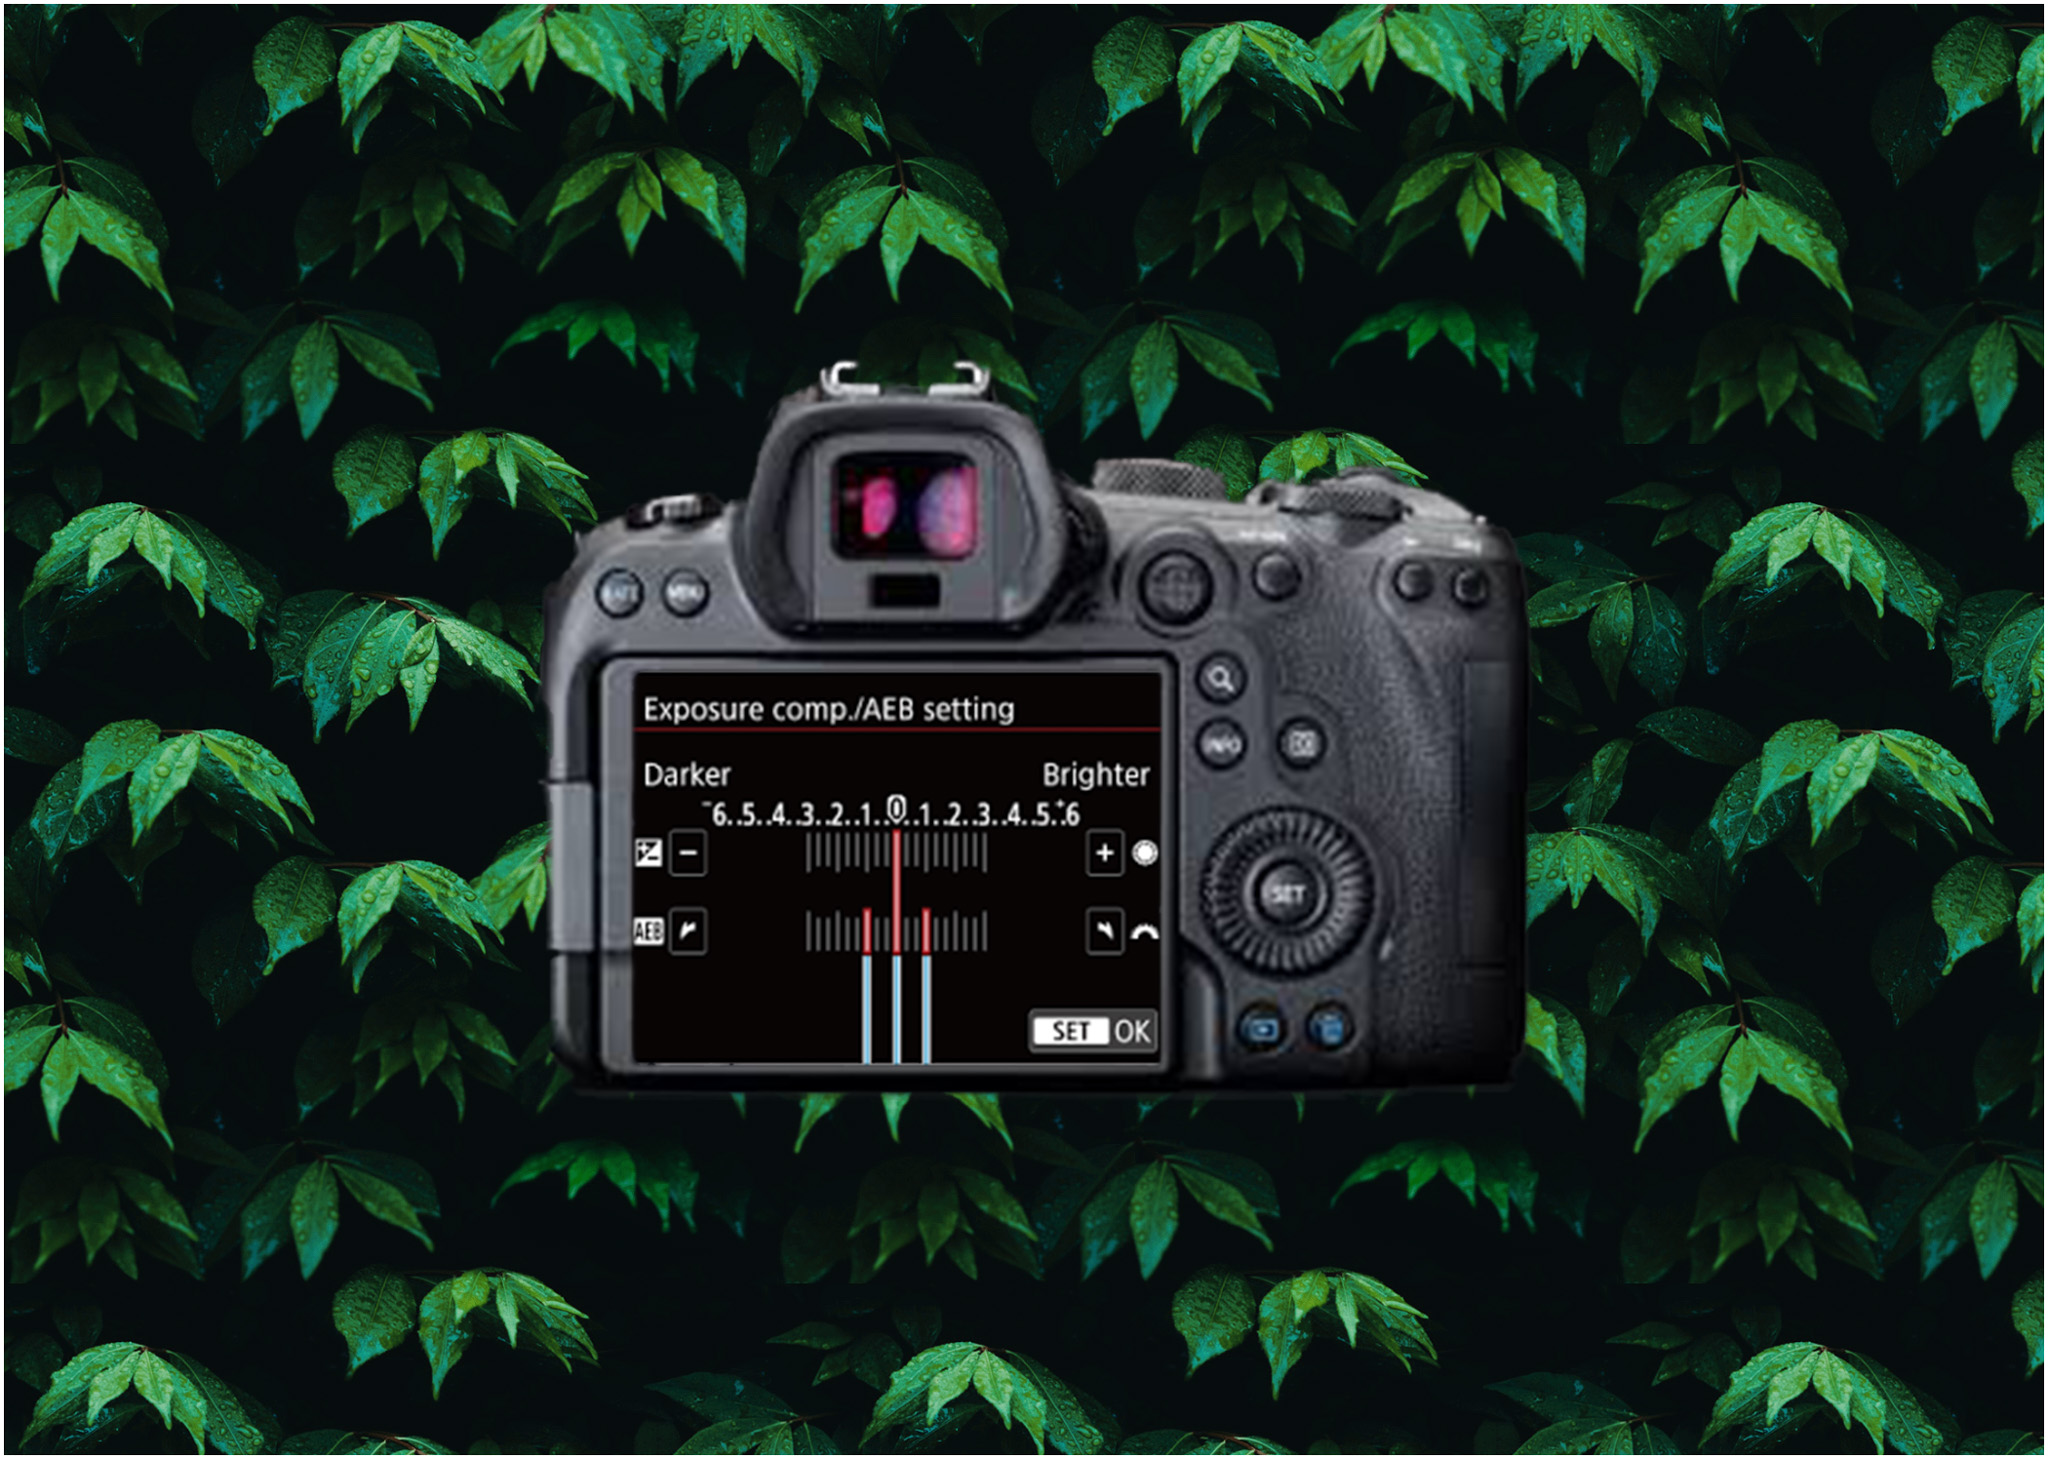
Automatic Exposure Bracketing (AEB) is one of the most commonly used bracketing techniques. With AEB, the R6 takes three or more shots at different exposure levels to capture details across the shadow, mid-tone, and highlight areas.
How to Set Up Exposure Bracketing on the Canon R6:
- Access the Menu: Press the menu button and navigate to the Shooting Menu.
- Select AEB: In the exposure compensation settings, select the AEB (Automatic Exposure Bracketing) option.
- Adjust Bracketing Range: Choose your exposure increments. The Canon R6 allows up to ±3 EV (exposure value) increments for bracketing, ideal for HDR.
- Continuous Shooting: To ensure all bracketed shots are taken quickly, switch to continuous shooting mode.
After taking the shots, you can merge them using HDR software, such as Adobe Lightroom or Photoshop, to create a single, balanced image.
Tips for Effective Exposure Bracketing:
- Use a Tripod: To align images perfectly, especially in HDR.
- Set ISO Low: For lower noise in combined images.
- Enable Silent Shutter: To minimize vibrations.
Focus Bracketing
Focus bracketing, or focus stacking, is especially useful in macro and landscape photography, where achieving a sharp image across the entire frame can be challenging. This function allows the R6 to take multiple shots with different focus points, which can be merged later for optimal depth of field.
How to Set Up Focus Bracketing on the Canon R6:
- Navigate to the Focus Bracketing Menu: In the Shooting Menu, find the Focus Bracketing option.
- Enable Focus Bracketing: Toggle this function on.
- Set Number of Shots: Determine how many shots you want in the focus stack (this can vary based on the depth of field you want).
- Adjust Focus Range: This defines how much the focus point shifts with each shot. Wider ranges are suited for landscapes, while narrow ranges work well in macro photography.
The images can then be merged in post-processing software, such as Helicon Focus or Photoshop, to create a sharp, detailed image with an extended depth of field.
Focus Bracketing Tips:
- Use Manual Mode: For consistent settings across all shots.
- Use a Remote or Timer: To avoid camera shake.
- Consider Light Source: Ensure consistent lighting for each shot, as this makes blending easier in post-processing.
White Balance Bracketing (WB Bracketing)
White Balance Bracketing is beneficial in scenes with mixed lighting conditions or when the correct color temperature is difficult to determine. This option allows the R6 to capture multiple shots of the same scene, each with slightly different white balance settings.
Setting Up White Balance Bracketing on the Canon R6:
- Access the WB Bracketing Menu: Go to Shooting Menu > White Balance Settings > WB Bracketing.
- Choose the Increment Value: You can select the difference in white balance between shots.
- Set Custom White Balance or Use Auto WB: Based on the lighting, choose your starting point.
WB Bracketing is ideal for photographers working in conditions where different light sources affect the color balance. Reviewing these shots afterward allows you to pick the version with the most accurate color tones.
White Balance Bracketing Tips:
- Review Shots in Camera: Take a moment to check the shots on the R6’s LCD to see the differences.
- Use Raw Format: Shooting in RAW lets you adjust the white balance more flexibly in post-processing.
Best Practices for Bracketing on the Canon R6
- Use RAW Format: RAW images retain more data, making post-processing and merging more effective.
- Use a Stable Tripod: Stability is key in bracketing, particularly for HDR and focus bracketing.
- Remote Shutter Release: Reduces shake during continuous shooting.
- Review Images in Playback: Ensure bracketing captured all exposures or focus points as expected.
Post-Processing Bracketed Images
Bracketing often requires merging in post-processing software to get the best results. Here’s a quick overview of merging options for each type of bracketing:
- HDR Merging for Exposure Bracketing: Use Lightroom or Photoshop for HDR merging, or dedicated HDR software like Photomatix.
- Focus Stacking for Focus Bracketing: Software like Helicon Focus or Photoshop aligns and stacks images to extend the depth of field.
- Color Adjustment for White Balance Bracketing: Use Lightroom or Photoshop to manually select or blend different white balance shots to match the intended color tone.
Conclusion
The Canon R6 offers an impressive array of bracketing features that can enhance your photography, especially in challenging shooting scenarios. Whether capturing high dynamic range landscapes, extending depth of field in macro shots, or balancing color in mixed lighting, the Canon R6’s bracketing options are both powerful and easy to use. By mastering each type of bracketing and refining your post-processing skills, you can create images that are well-exposed, sharp throughout, and visually striking, accurately reflecting the scene you envisioned.
Thank you for reading! Stay connected with me on all my social media platforms. @djmakeart
For more updates, tips, and inspiration. Don’t forget to explore my website djmakeart.com for exclusive content and projects. Let’s create and grow together—see you there!


